Friday, 8 February 2019

#simplestamping botanical butterfly

Today’s simply stamped card is all about the dsp. I wanted to show just how quick and easy it can be to put a pretty card together. Let’s face it although hours of crafting is fun, sometimes you need a quick card. This one took literally 5 minutes.


I love Botanical Butterfly dsp from the sale-a-bration catalogue and this page in particular is really pretty. The happy birthday sentiment is from Perennial Birthdays and has been stamped in balmy blue. I will be using this set again in my next #simplestamping post.

Shop with me....

During Sale-a-bration (3rd Jan - 31st Mar) spend £45 or more with me as your demonstrator and...
in addition to your SALE-A-BRATION rewards
.....I will send you a little something extra as a thank you gift from me.

In order to qualify

you must enter the current host code when you place your order
(info can be found in my order incentives and host codes post)

you need to make sure you DON’T tick the ‘no contact’ box
(otherwise I have no way of getting your freebies to you)

The purchase suggestions I make are to help and inspire you. Sale-a-bration rewards and the incentives that I am offering are based on the amount you spend not specifically the items that you purchase, so feel free to follow my suggestions, mix it up a bit or do your own thing.

Back soon,
Katie x


Product List

Tuesday, 5 February 2019

Stamparatus techniques.

Today’s post is all about the Stampin’ Up! Stamparatus. Apologies it's a long one but I wanted to give a step by step guide to techniques that the Stamparatus makes possible.


These are the two cards I have made today using the Stamparatus. Perfect placement, repeat pattern and wreath pattern are all made possible using this tool, it’s really not difficult and requires patience rather than skill.

Celebrate your day

I have made this card using the wreath stamping technique, you need to make sure your card square is tucked right into the corner to ensure it is repositioned correctly after each turn. I find placing the stamp away from the hinges gives the best results. Turn the layer by 90° after stamping your flower and then reposition the stamp after the fourth turn.


On this card I changed colour each time I repositioned the stamp. I have stamped the larger flower in 4 different colours and filled the gaps using the little flower in 3 colours.


Once the wreath pattern was created I stamped each of the cupcake elements. By placing the stamp on the card (uninked) and lowering the hinged plate to pick it up ensures it is in exactly the right position.


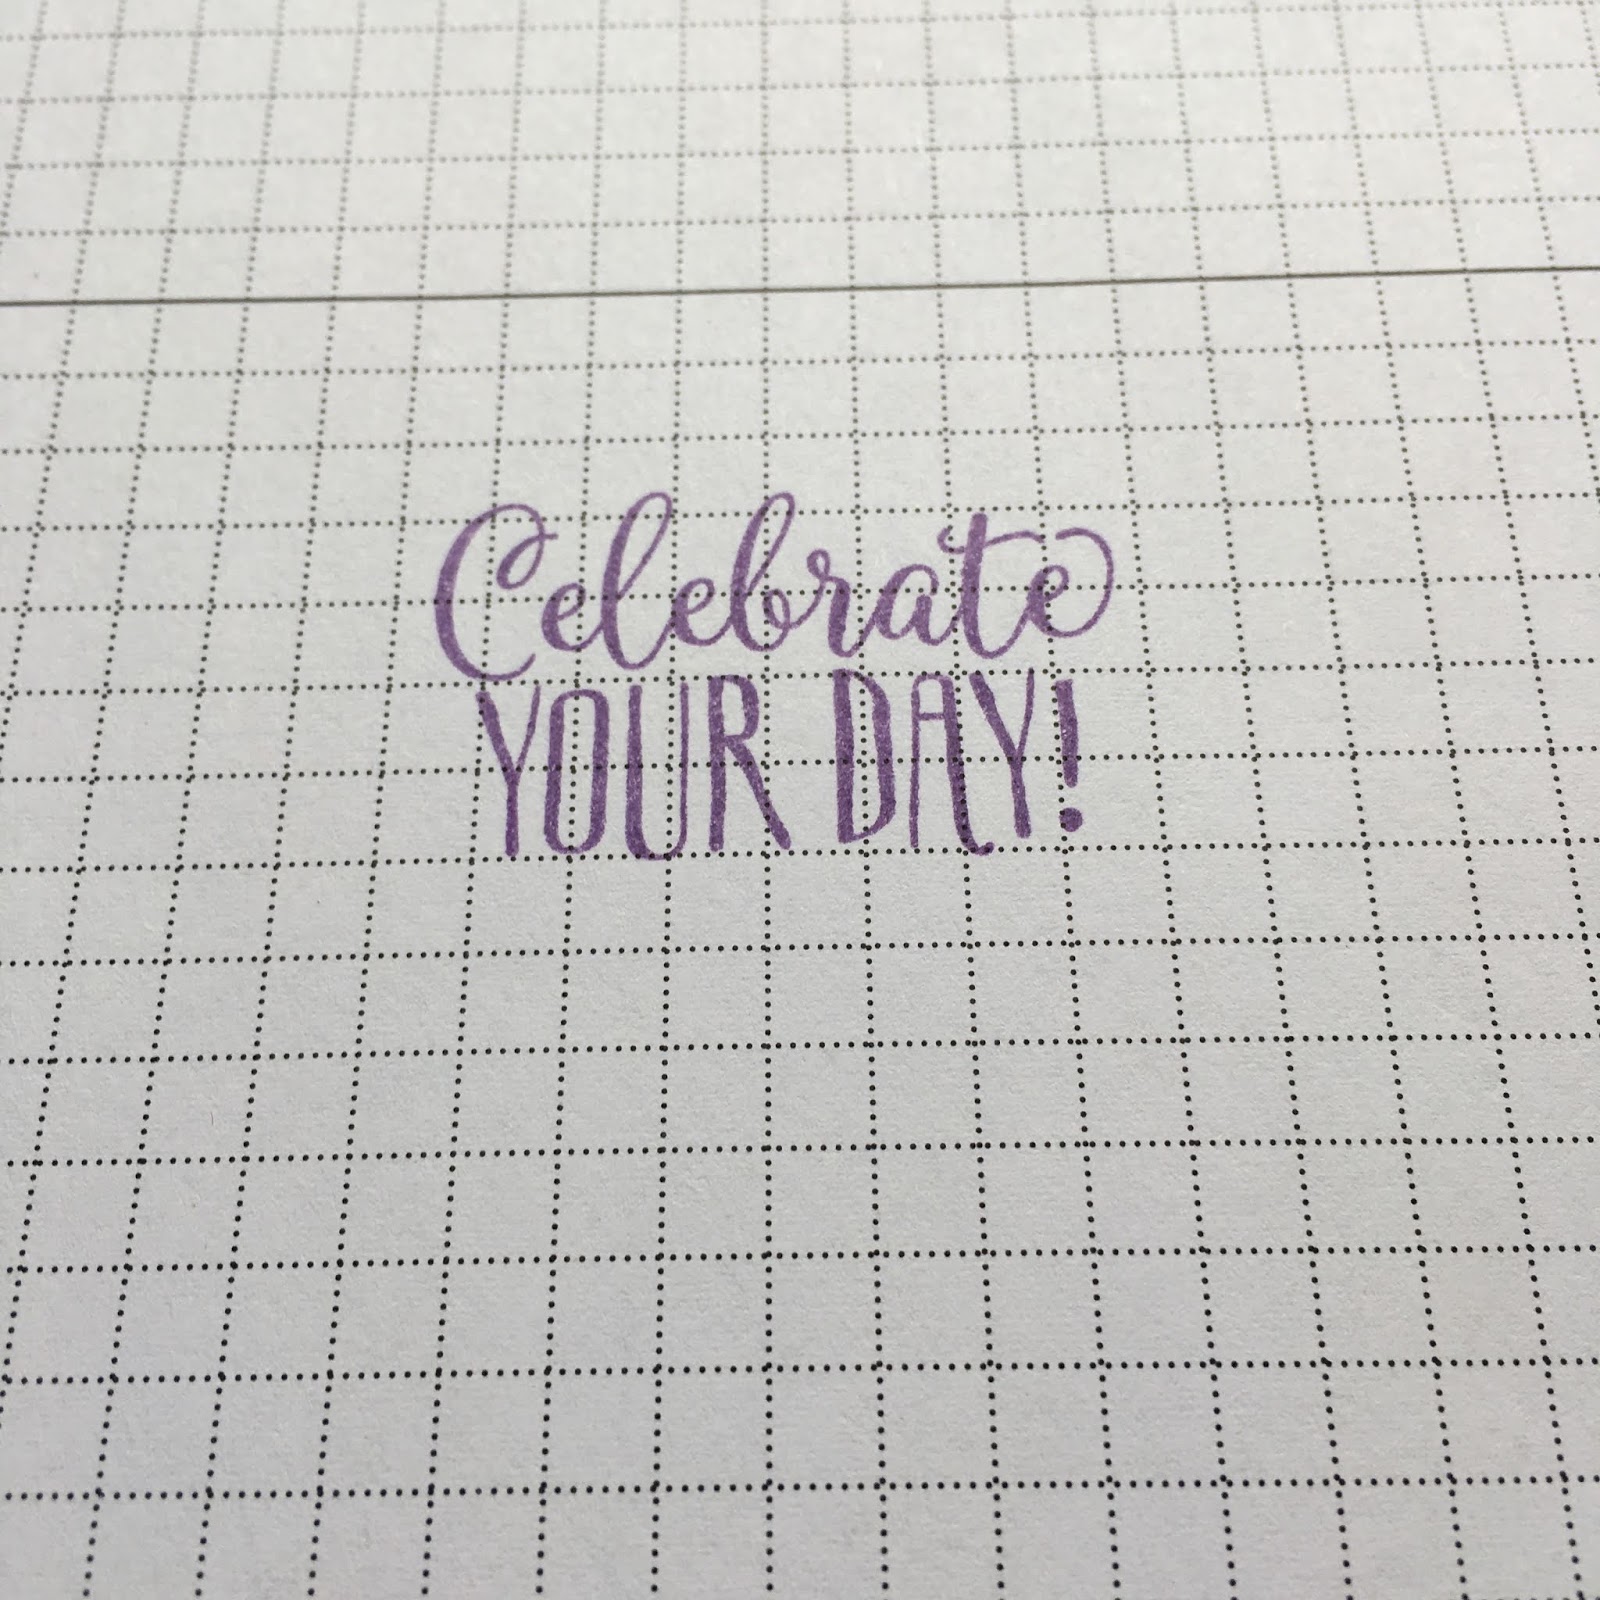
I wanted to stamp the sentiment onto an oval shape and used the Stamparatus for 'perfect placement'.

The first step is to stamp onto the grid paper.


Then cut out your oval and place the piece it was cut from over the sentiment.


Once you are happy it is lined up correctly, place the oval inside and stamp.


I have used two of the colours in the flowers as layers and adhered the sentiment oval using mini dimensionals.


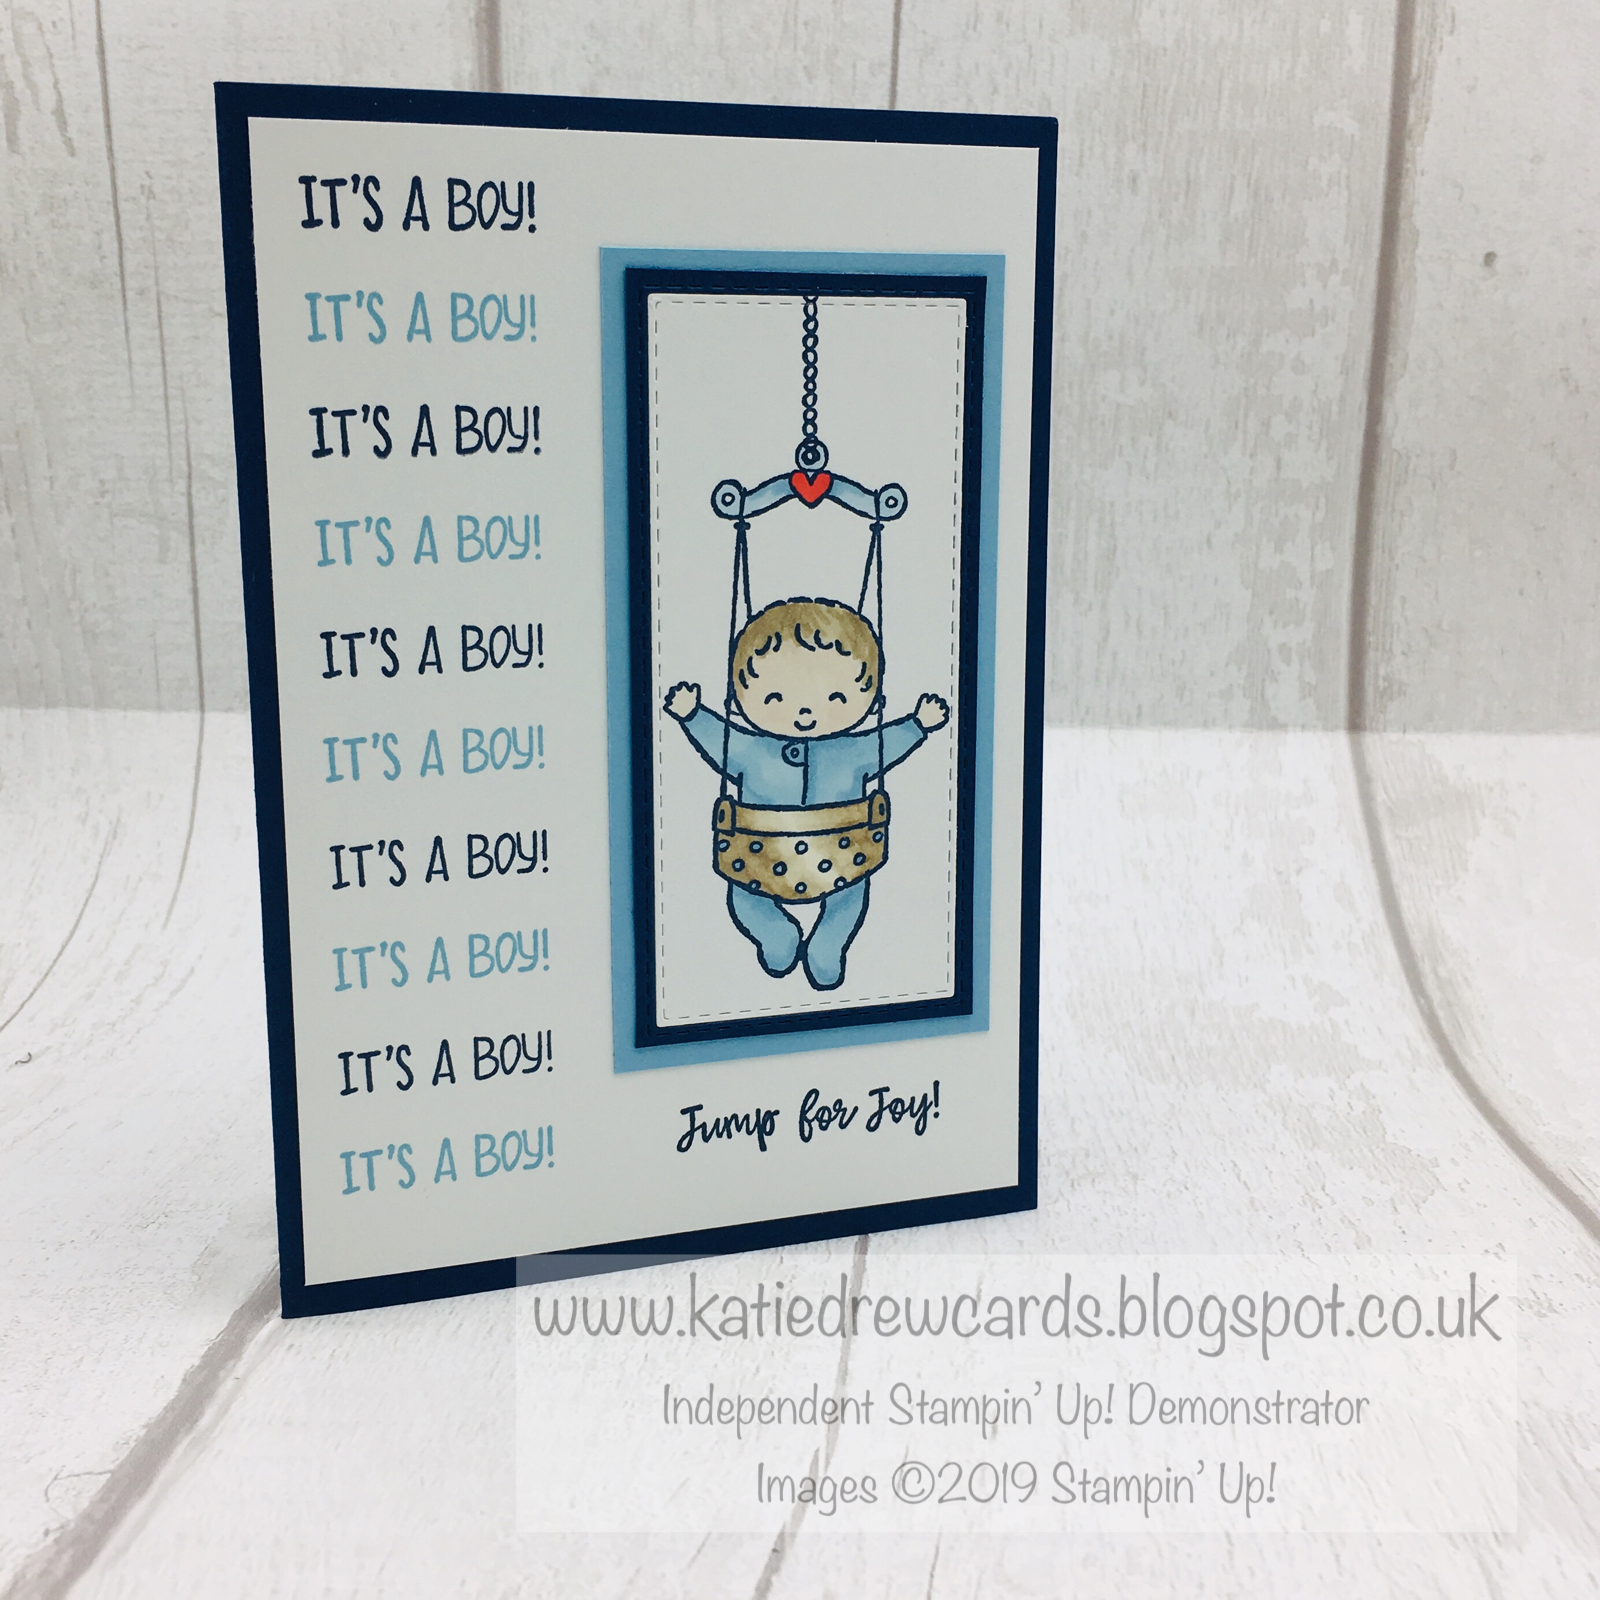
It's a boy

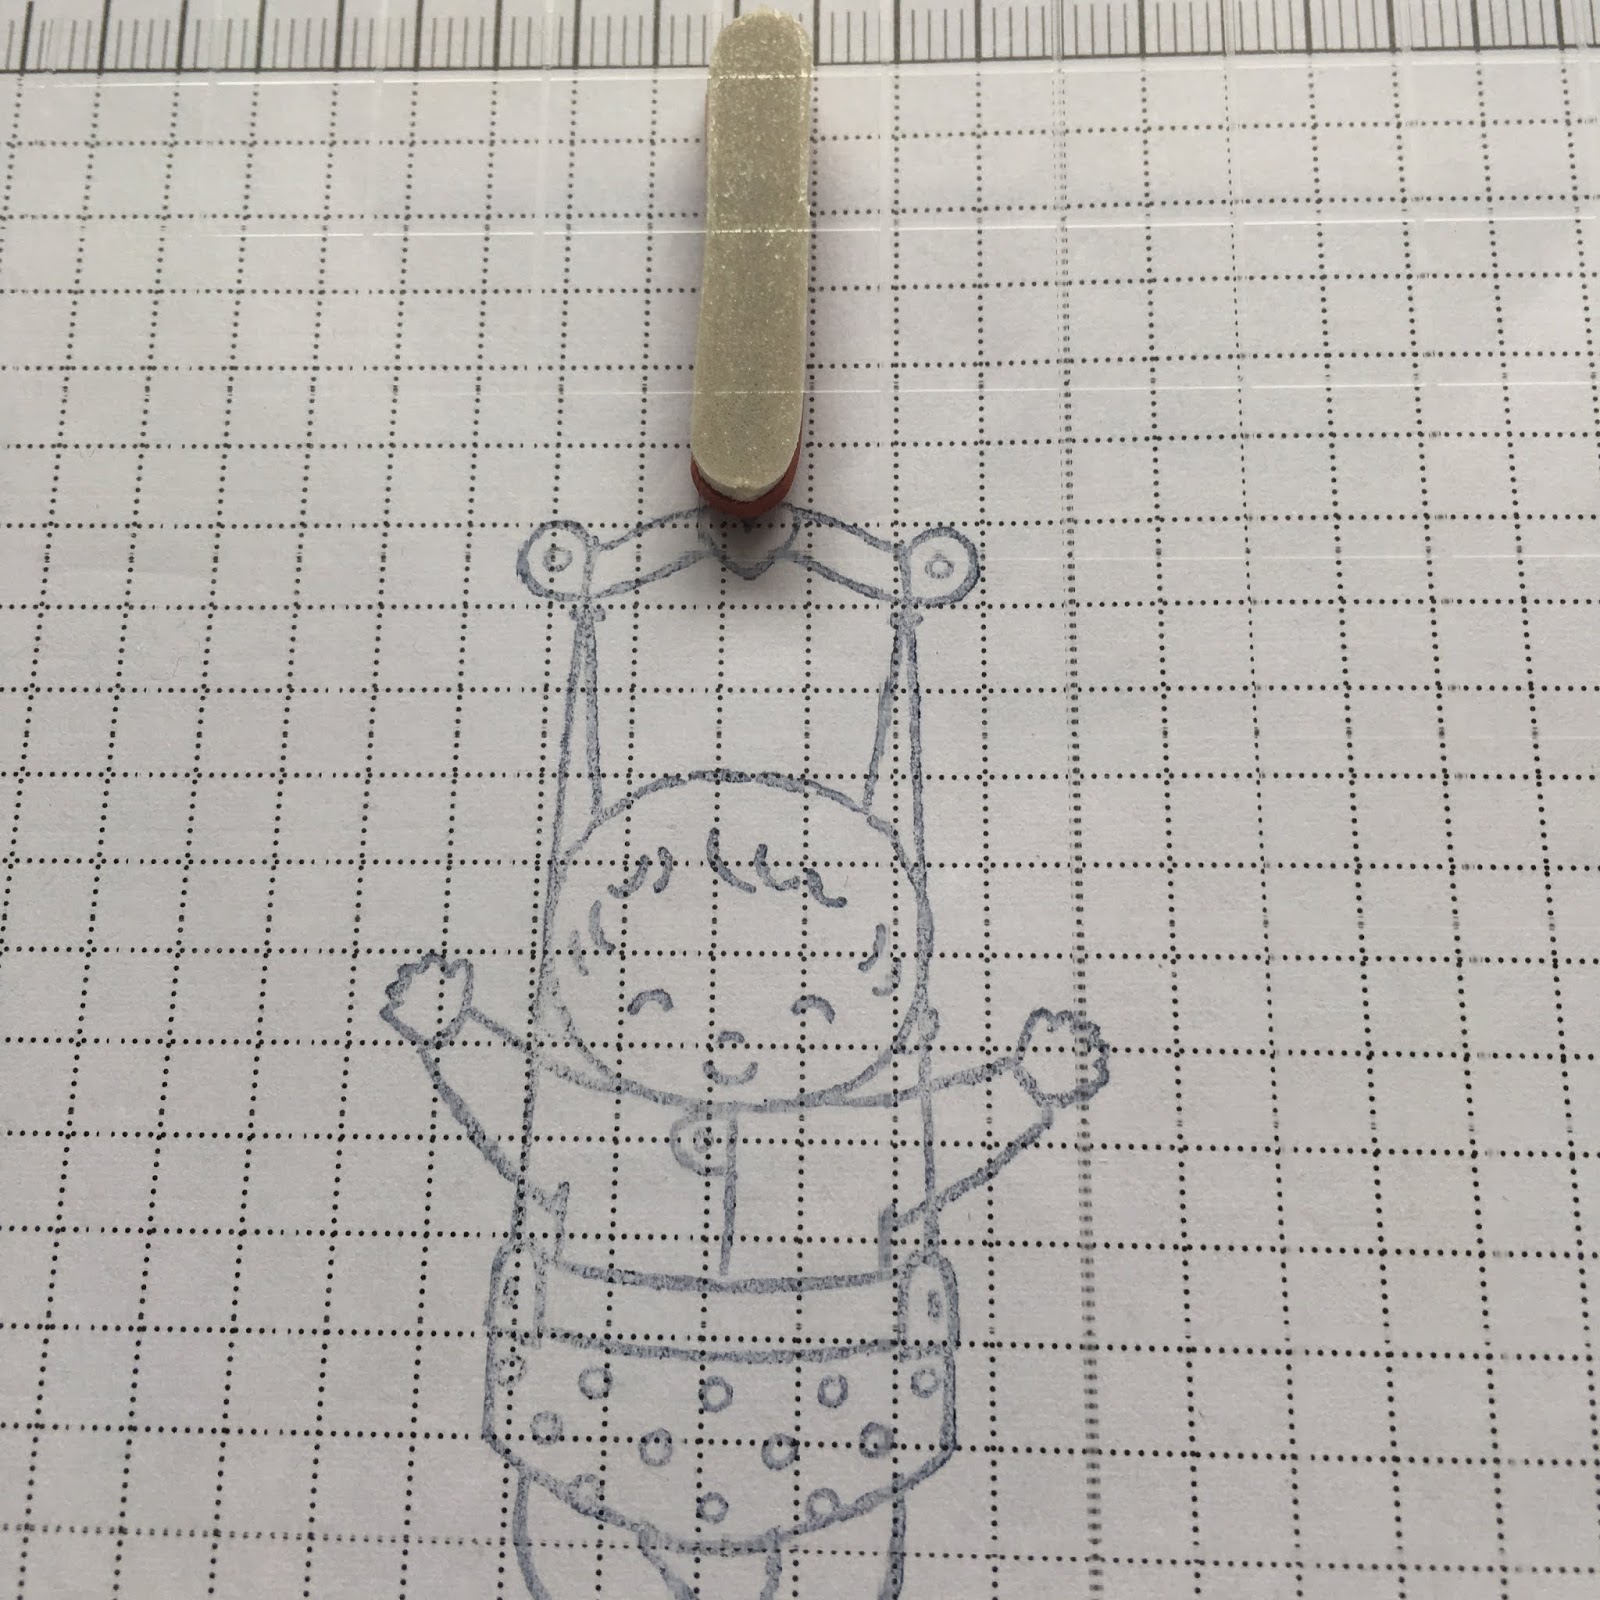
This next card uses the repeat stamping technique. The Stamparatus plates can be moved down (and across) on the hinged sides allowing for printing in a repeat pattern without moving the stamp. This stamp set is clear mount (red rubber) so to make sure it stamps straight use the grid lines on the Stamparatus plates to line it up and stamp first on the grid paper to make sure you are happy with the placement. As this is quite a small sentiment I did the night of navy repeats first and then repositioned the stamp in between to stamp the balmy blue repeats.


When I stamped the jump for joy sentiment I hadn't applied quite enough ink to the stamp, another benefit of using the Stamparatus is you can re-ink and stamp again in EXACTLY the same place!


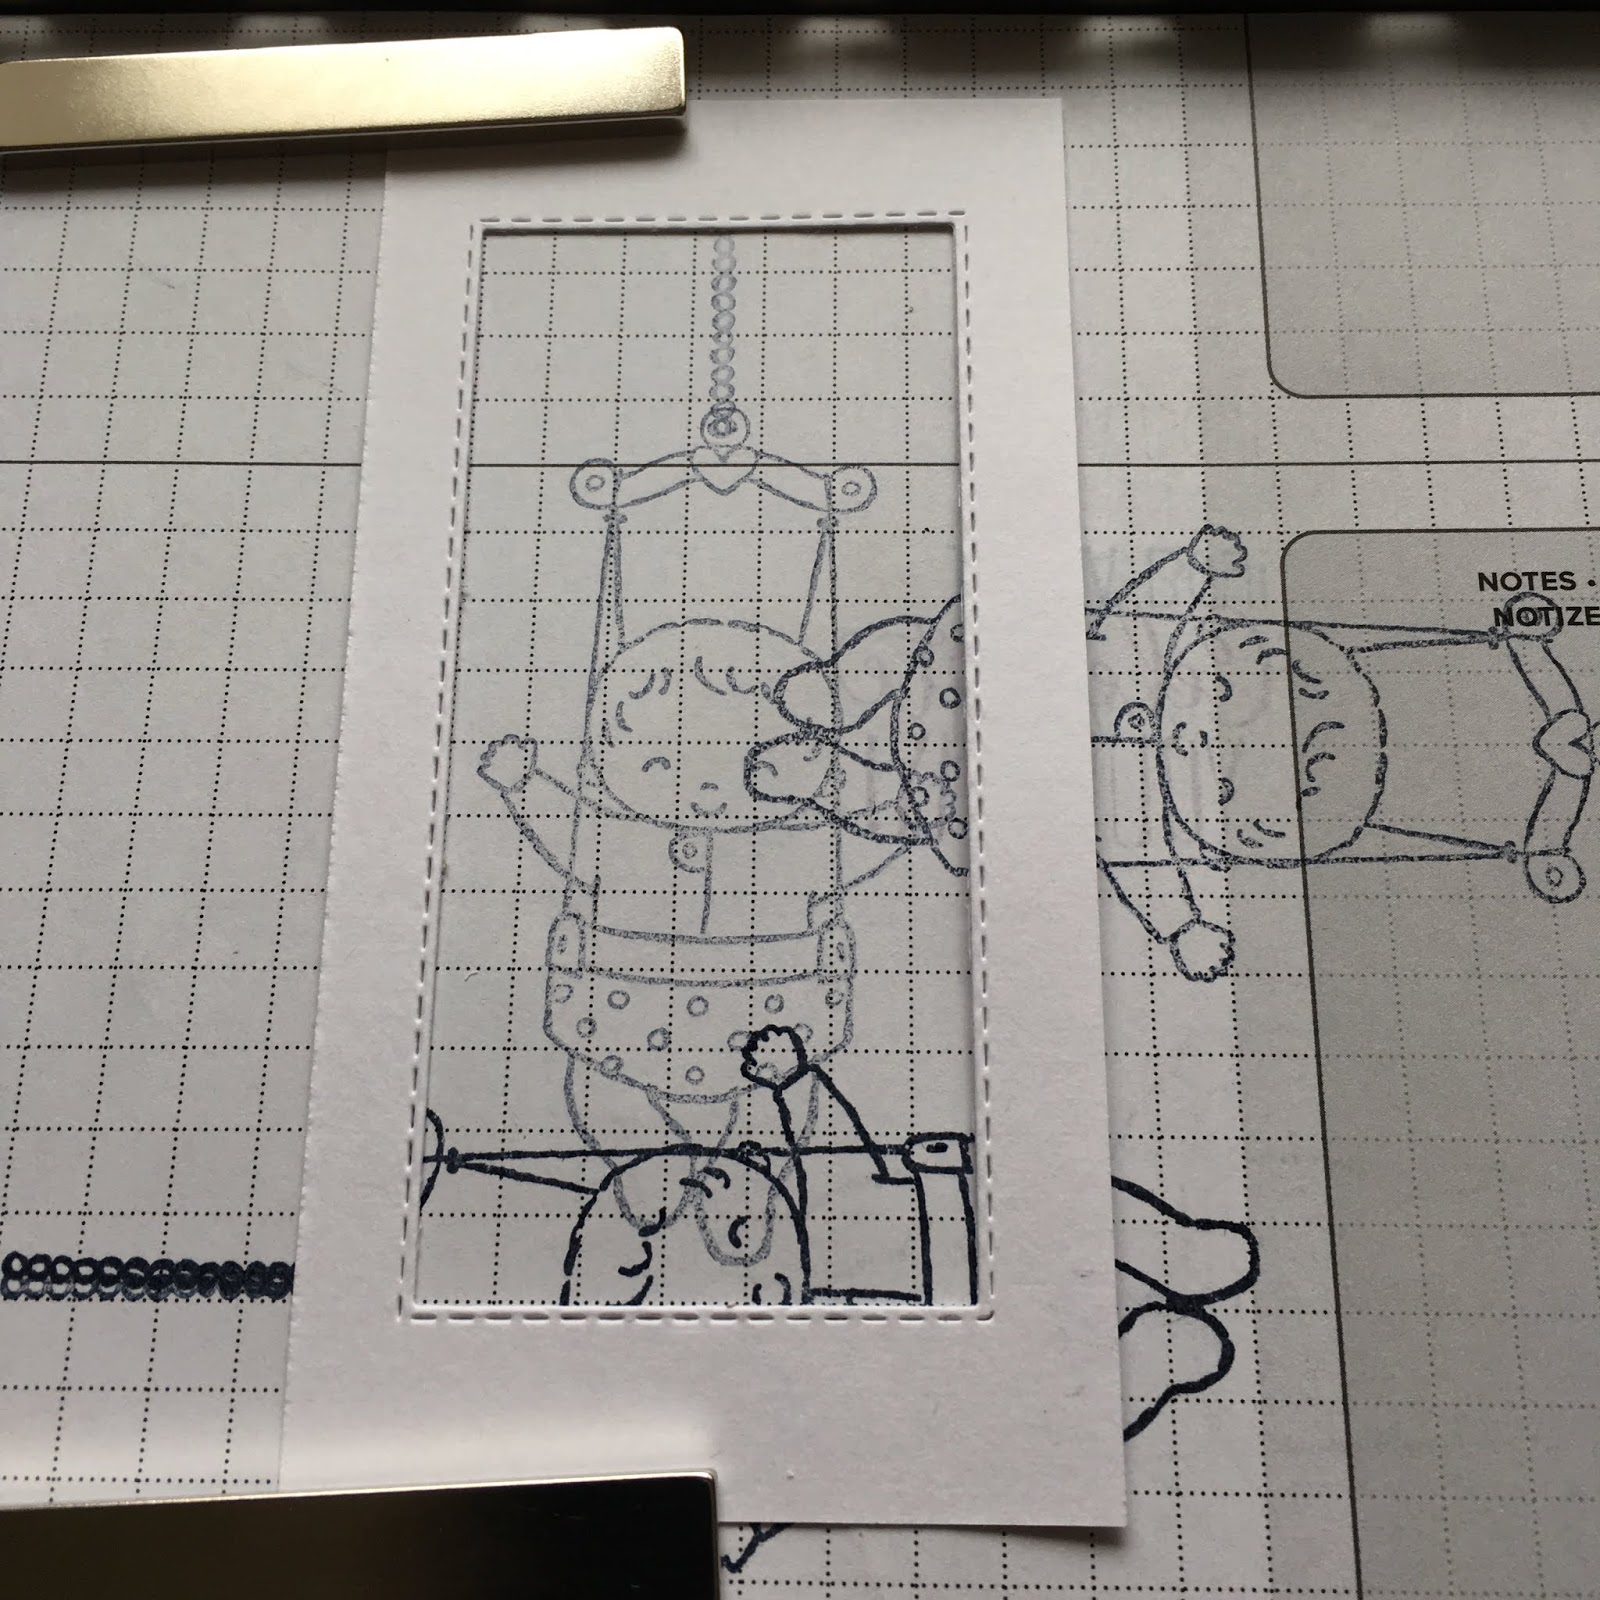
Finally the image was stamped using a similar method to the sentiment on the last card. I wanted to make sure the cord of the bouncer was lined up perfectly so stamped it on my grid paper several times until I was happy it was perfectly placed.


The image was coloured using Stamping' Up! blends and then layered onto night of navy and balmy blue card before being added to the card front.


The Stamparatus is such a useful tool, some of these techniques just wouldn't be possible without it. Perfect placement means a lot less wasted card and for some who perhaps struggle with getting a crisp image it really does make all the difference.

Shop with me....

During Sale-a-bration (3rd Jan - 31st Mar) purchase your Stamparatus selecting me as your demonstrator and...
in addition to your SALE-A-BRATION rewards
.....I will send you a free pack (50 sheets) of Stamparatus Grid Paper worth £6.00.


In order to qualify

you must enter the current host code when you place your order

SRJB9W2T (February '19)

you need to make sure you DON’T tick the ‘no contact’ box
(otherwise I have no way of getting your grid paper to you)

I hope you found this tutorial useful, free feel to ask me any questions about the wonderful Stampartus, thanks for reading,
Katie x

Product List

Sunday, 3 February 2019

Waterfront at night

I’ve been playing with my Waterfront stamp set today and had the idea of stamping directly onto the night sky page of Twinkle Twinkle dsp.


I like using white ink but it is quite opaque so I realised I would need to build the scene up in layers if I didn’t want the stars to show through.

I started with memento black and stamped the bottom area using one of the larger waterfront stamps, I kept stamping until I was happy that the dsp pattern wasn't showing through. I then stamped the mountains, trees and moon, again in black.

Once the black ink was dry, which only took a few minutes I stamped in the following order - mountains in white, mountains in smoky slate and then the mountain peaks in white. Next the moon in white then in so saffron followed by the trees in white then shaded spruce, lastly I stamped a white streak to look like light reflecting off the water below the moon.

The sentiment has been stamped in night of navy and comes from the Butterfly Gala set.

I'm quite pleased with how it turned out, the paper really does do 'night sky' perfectly.

Shop with me....

During Sale-a-bration (3rd Jan - 31st Mar) spend £45 or more with me as your demonstrator and...
in addition to your SALE-A-BRATION rewards
.....I will send you a little something extra as a thank you gift from me.

In order to qualify

you must enter the current host code when you place your order
(info can be found in my order incentives and host codes post)

you need to make sure you DON’T tick the ‘no contact’ box
(otherwise I have no way of getting your freebies to you)

The purchase suggestions I make are to help and inspire you. Sale-a-bration rewards and the incentives that I am offering are based on the amount you spend not specifically the items that you purchase, so feel free to follow my suggestions, mix it up a bit or do your own thing.

Thanks for looking,
Katie x


Product List

Friday, 1 February 2019

#simplestamping Hello Cupcake

Hi and welcome to February! I thought I'd have a go at the simple stamping challenge this month, the idea is to focus on stamping, showing what can be achieved with minimal supplies. The challenge in February is to create birthday cards using a stamp set and inks with the addition only of designer series paper.

For my first card I have chosen to use the sale-a-bration item Hello Cupcake.


I love this set and honestly think I would have bought it if it hadn't been a free choice. It stamps really well, is easy to line up and the cupcake image is a good size.

The dsp Twinkle, Twinkle is really versatile, the key colours are pool party, soft sea foam and petal pink. Each pack contains 12 designs (6 double sided sheets) and I have only used approx. 1/6th of a single sheet.

If you purchase the items required to make this card (see the product list below) you can get the stamp set for free as your sale-a-bration item.

You could easily make 40 cards with this purchase and have plenty of dsp left over, such good value for a new crafter!

Shop with me....

During Sale-a-bration (3rd Jan - 31st Mar) spend £45 or more with me as your demonstrator and...
in addition to your SALE-A-BRATION rewards
.....I will send you a little something extra as a thank you gift from me.

In order to qualify

you must enter the current host code when you place your order
(info can be found in my order incentives and host codes post)

you need to make sure you DON’T tick the ‘no contact’ box
(otherwise I have no way of getting your freebies to you)

The purchase suggestions I make are to help and inspire you. Sale-a-bration rewards and the incentives that I am offering are based on the amount you spend not specifically the items that you purchase, so feel free to follow my suggestions, mix it up a bit or do your own thing.

Back soon with more simply stamped birthday cards,
Katie x

Product List